
Garmin Pay shares similarities with Fitbit Pay, Apple Pay, and Google Pay. It functions as a mobile payment system that seamlessly integrates with contactless payment readers. With Garmin Pay, you have the convenience of making in-store purchases directly from your wrist, eliminating the need for a wallet or phone.
As an illustration, imagine you’re out on a run and decide to pause to purchase a bottle of water. Thanks to Garmin Pay, all you need is your Garmin device to effortlessly complete the payment transaction. To provide you with a comprehensive understanding of Garmin Pay, let’s explore which devices support it and delve into its operational mechanism.
What is Garmin Pay?
Garmin Pay operates similarly to other contactless payment systems available in the market. By using a compatible Garmin watch, you can conveniently make payments by simply bringing your wrist close to a contactless card reader. That’s all it takes – no more searching for your phone, wallet, cards, or cash.
How to set up Garmin Pay
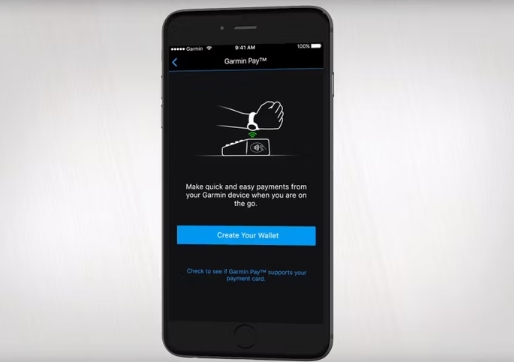
Configuring Garmin Pay is a hassle-free process. Simply open the Garmin Connect mobile app on your smartphone and tap on the Garmin device that is linked to your account, located at the top of the page. Within the subsequent menu, you will find the option to set up Garmin Pay. Alternatively, you can access the Garmin Pay setup through the settings menu as well.
Following that, you will receive a prompt to add your MasterCard, Visa, Maestro, or Discover card to Garmin Pay, which will be utilized for your transactions. Begin by selecting the type of card you wish to add and then manually enter the necessary card details. Additionally, you will be required to input a security code that will be sent to you for verification purposes.
To ensure security, it is essential to set a four-digit PIN code as a passcode on your watch. This passcode will help safeguard your device. Upon successful completion of the verification and tokenization process, the card will be successfully added to your Garmin Pay wallet. By tapping on Garmin Pay, you can conveniently view the added card. If needed, you can temporarily suspend or delete a card from your wallet at any time by selecting the respective options within the Garmin Connect app when you tap on the card.
Using Garmin Pay in a store
Garmin Pay is accepted at any establishment that supports contactless payments. Simply keep an eye out for the contactless payment symbol located near card readers when you’re ready to complete your purchase.
Although stores may not display a dedicated logo for Garmin Pay alongside Apple Pay and Google Pay, you can still utilize your Garmin device for payment if you spot the contactless payment symbol. So, whenever you come across this symbol, rest assured that you should be able to make payments using your Garmin device.
How to make a payment with Garmin Pay
To access the virtual wallet on your watch, simply press and hold the action button, which will bring up the Navigation Controls menu. From there, locate and tap the virtual wallet icon. You will then be prompted to enter your four-digit passcode for authentication. It’s important to note that you’ll be required to enter the passcode every 24 hours or whenever you put the watch back on after removing it. Once the wallet is open, you will find your most recently used card displayed automatically. However, you always have the option to switch to a different card if needed.
Switching cards on your watch is a breeze – simply swipe down on your screen to move to the next card in your wallet. Once you’ve selected the desired card, your watch will guide you to hold your wrist close to a contactless card reader. After a brief moment, the outer edge of your watch face will illuminate in green, signifying the successful completion of your purchase. Your watch will then return to your default watch face. And that’s all there is to it!
Important Note: It’s crucial to be aware that if you make three unsuccessful attempts at entering your passcode, the virtual wallet on your watch will become locked. To set a new passcode, you’ll need to access the Garmin Connect app on your phone. During this process, you will be required to re-enter your old passcode. In the event that you cannot recall your old passcode, Garmin prioritizes your security and will delete your entire virtual wallet as a precautionary measure. If this happens, you can simply repeat the setup steps mentioned earlier to create a new virtual wallet.

Which cards/banks support Garmin Pay?
Garmin Pay is compatible with a wide range of credit and debit cards issued by major banks. It also supports numerous major credit and debit card providers such as Visa and MasterCard. However, it’s important to note that card compatibility is contingent on your bank’s support. In other words, if your bank is not supported, you won’t be able to connect your card to Garmin Pay.
Similar to the initial stages of Apple Pay and Google Pay, it may take some time for banks to come on board with Garmin Pay’s mobile payment technology. It is worth noting that while certain traditional banks may not currently support Garmin Pay, many online banks or card providers do. If your bank is not supported, you might want to consider opening a new account with a supported institution to gain access to Garmin Pay.
Anything else you should know?
Apart from the passcode you established during the setup process, no additional authentication methods like fingerprint scans are required for Garmin Pay. However, it’s important to note that there may be limitations on the amount you can spend in a single transaction. In the UK, contactless payment transactions typically have a limit of £45, while certain US banks may set a limit of $50. These limits are in place to ensure security and protect against unauthorized transactions.